Video: Text messaging with Broadstripes (including Opt in instructions)
How text messaging permissions work
Every cell phone number in Broadstripes carries one of four messaging permissions:
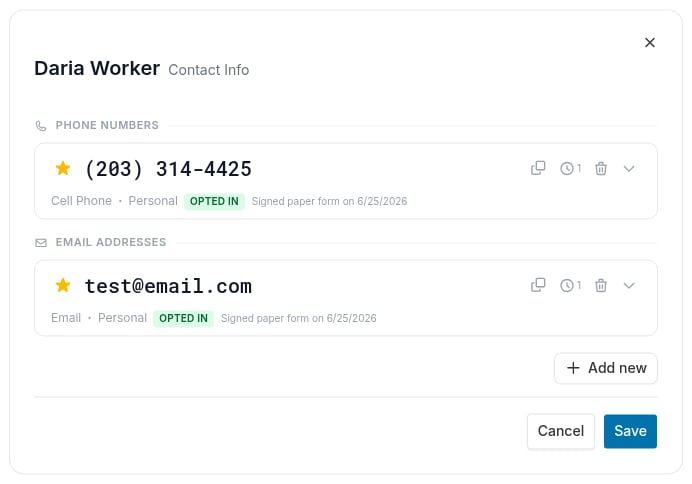
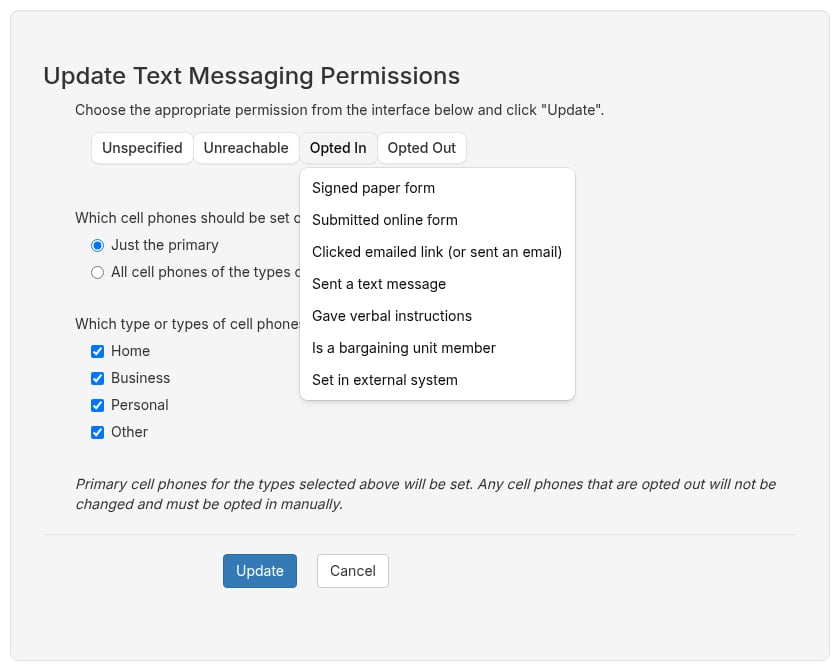
When you opt a number in or out, you also record a reason: Signed paper form, Submitted online form, Clicked emailed link (or sent an email), Sent a text message, Gave verbal instructions, Is a bargaining unit member (opt in only), or Set in external system. Broadstripes stores the reason and the date next to the permission, for example “Signed paper form on 6/25/2026”, so you can always show how consent was obtained.
Permissions apply to Cell Phone entries only. A number saved with the type Phone cannot be texted, so it has no permission control.
Besides setting permissions by hand, Broadstripes records them automatically when a worker checks the Cell phone opt in box on a public form (reason: Submitted online form), when you import a spreadsheet that includes messaging permission columns, and when a worker replies STOP to one of your texts.
Only admins and users with the Can set opt-in/opt-out permission can change messaging permissions. Everyone else can see a number’s permission but not change it. See User and membership overview for how to grant the permission.
Opt in or opt out a single worker’s cell phone
-
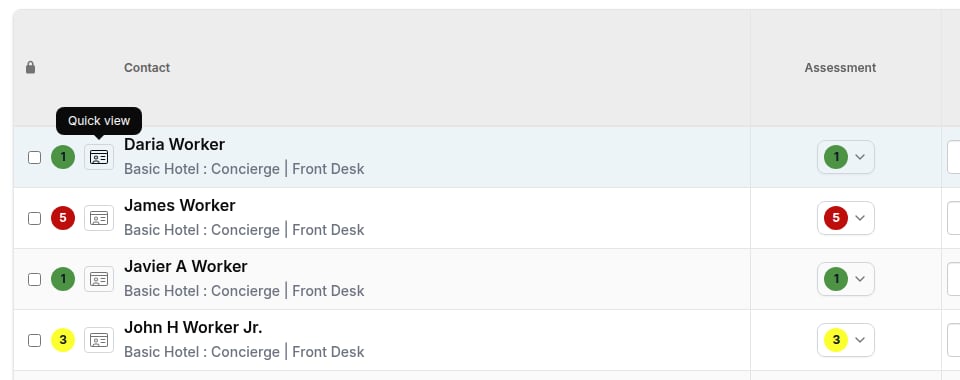
From the Search Results page, click the Quick view icon () next to the worker’s name.
-
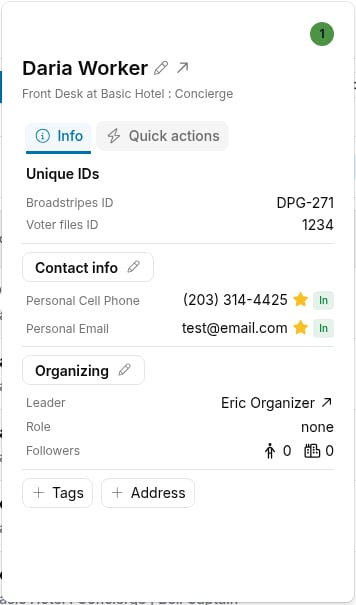
In the Quick view panel, click the Contact info heading (it shows a pencil icon) to open the worker’s Contact Info dialog. Each phone number and email address appears as a card with its current permission.
-
To add a new number, click Add new and choose Cell Phone. A new card opens with the type already set and its permission at Unspecified. Type the number and choose its group.
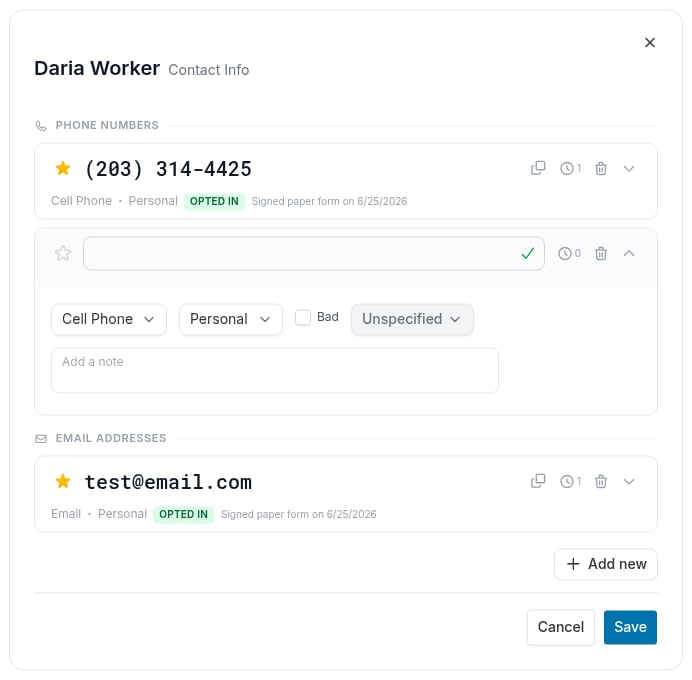
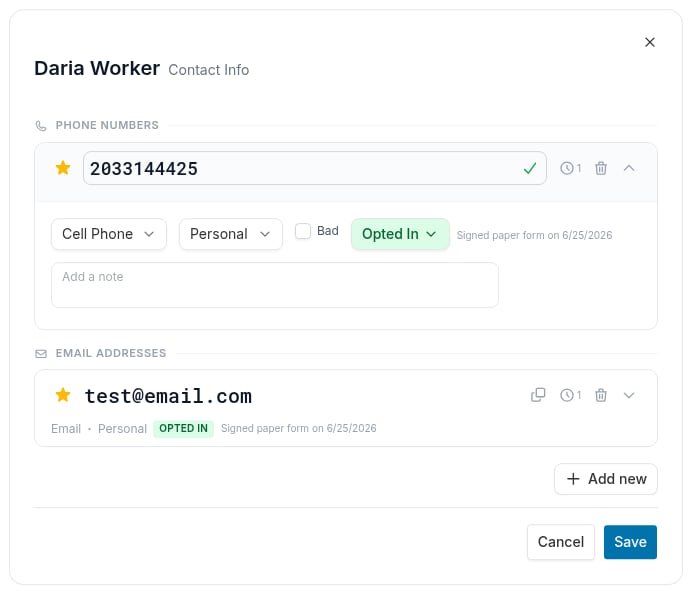
-
Click the permission control (it shows the current permission, such as Opted In or Unspecified). To opt the number in, point to Opted In and choose the reason the worker gave you.
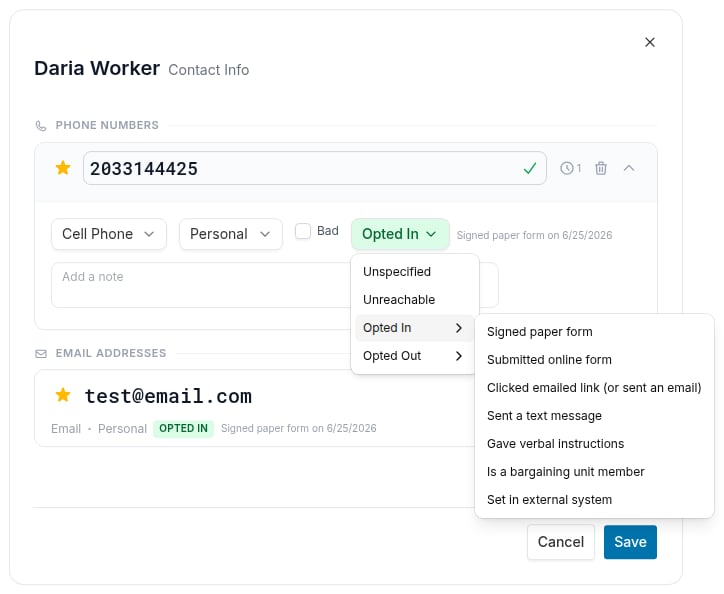
-
To opt the number out, point to Opted Out and choose the reason instead. Unspecified and Unreachable need no reason.
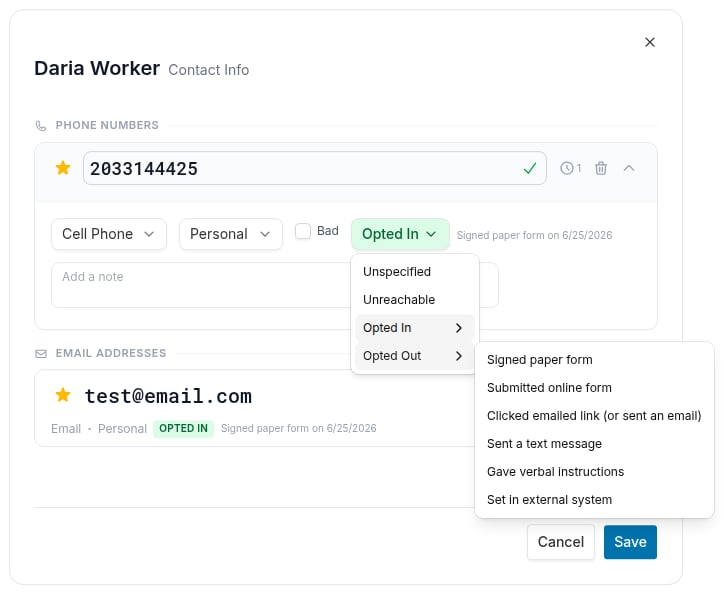
- Click Save. The card’s badge changes to the new permission, and the reason and date appear next to it.
Opt in or opt out many workers at once with a Bulk Action
- Open a tag list or run a search to find the workers whose permissions you want to set. (If you need help running a search, check out the Search documentation.)
-
Select the workers. For this example we’ll select all 97 workers in our search results.

-
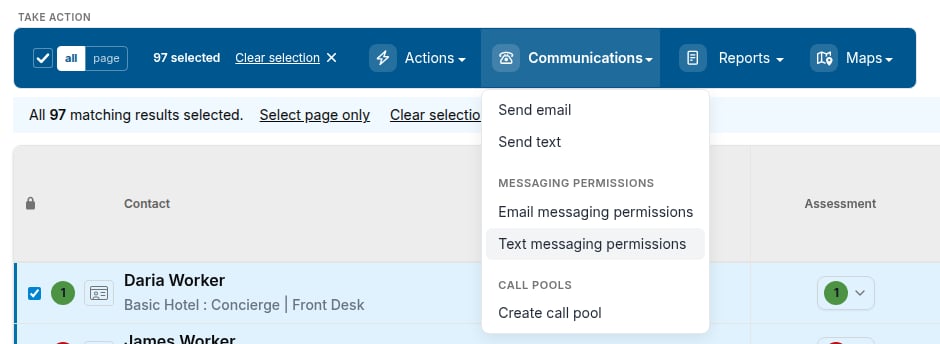
Open the Communications menu and choose Text messaging permissions.
-
In the Update Text Messaging Permissions panel, click Opted In and choose a reason.
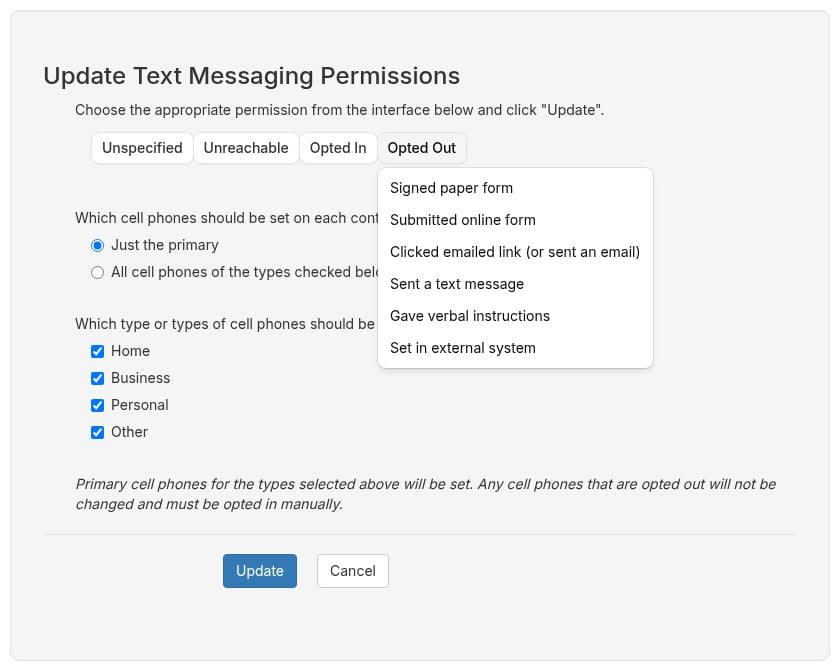
- Choose which cell phones to update on each record: Just the primary cell phone, or All cell phones of the types checked below (Home, Business, Personal, and Other).
- Click Update. Broadstripes updates the records in the background and lets you know when it finishes.
When a worker replies STOP
Workers can opt themselves out by texting back, and Broadstripes records it for you.- The first text Broadstripes sends to a worker ends with “Reply STOP to opt out of future texts.”
- If the worker replies STOP, STOPALL, UNSUBSCRIBE, CANCEL, END, or QUIT, either on its own or as the last word of the message, Broadstripes marks that cell phone Opted Out with the reason “Sent a text message” and stops texting it.
- If the worker later replies START, YES, or UNSTOP, Broadstripes opts the number back in with the same reason. If you text from a toll-free number, only UNSTOP opts the worker back in.
What opting out changes
- Send text skips any cell phone that is opted out, so an opted-out worker never receives a bulk text.
- Bulk permission updates and spreadsheet imports leave an opted-out number alone. Only someone editing the worker’s record, or the worker replying START, can opt it back in.
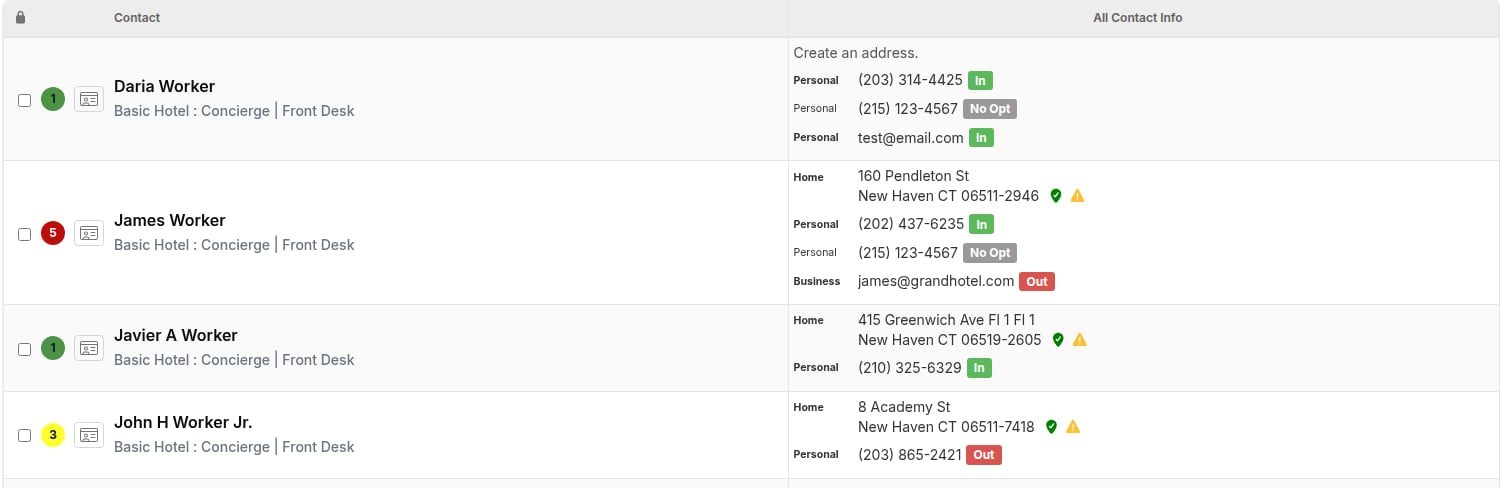
- Opted-out numbers show a red Out badge in search results and a red OPTED OUT badge on the worker’s contact card.
Find out who is opted in or out
-
Search for
textopt = in,textopt = out, ortextopt = unspecifiedto find workers by their cell phone permission, andtextoptinreasonortextoptoutreasonto find them by reason. See the search language reference for the full list. -
Add the All Contact Info column to a layout to see an In, Out, No Opt, or Unreachable badge next to every number, or add the Opted In Phones column to list only the numbers you can text.