

Intro
Social groups are a feature that let you group and view workers by anything they have in common – whether it’s the sports teams they follow, a common native language, or a shared break time.Why use social groups?
Social groups can be a great organizing tool for your campaign. With social groups, you can add and remove the workers you are tracking, and view them all on a single screen – even if they don’t work in the same department, or share other formal attributes in their organization. You can create as many social groups as you want, and just delete them when they’re no longer useful. Once you’ve set up social groups, you can also tag their leaders (optional). With leaders in place, social groups can become a tool for building organizing structures in Broadstripes. From any existing social group, it’s just a few more clicks to create a leadership structure. Here are some examples of when to use social groups:- To track unique social connections between workers
- To follow up with a group of people you’ve talked to during a break time or rally
- To connect people who might influence each other’s decision making, even if they have no formal ties in the workplace
Video: Create social groups
Before you begin
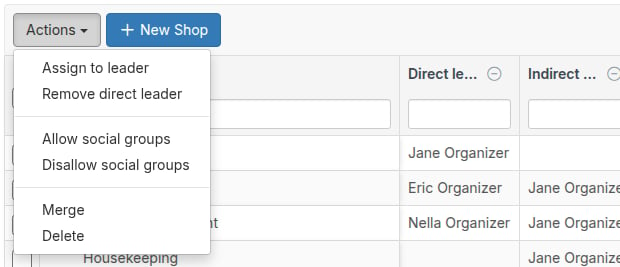
Social groups belong to a shop or department. Before anyone can create groups there, a project admin must allow social groups for that organization:- Click Shops & depts in the sidebar.
- Check the box next to each shop or department that should have social groups.
- Click Actions and select Allow social groups. To turn social groups off again later, select Disallow social groups from the same menu.
Social groups are read-only in an inactive project. You can still view groups, but not change them.
Open an organization’s social groups
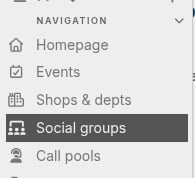
- Click Social groups in the sidebar.
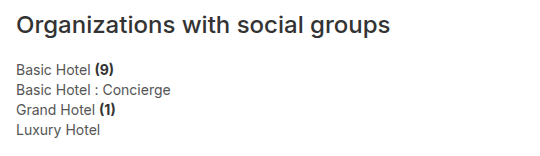
- The Organizations with social groups page lists every shop and department that allows social groups, with the number of groups each one has so far. Click the organization you want to work with.
- The organization’s Social Groups tab opens. You can also get here from the Social Groups tab on any organization’s record page, or by clicking Manage social groups on the organization’s Overview tab.
Create a social group and add members
For this example, we’ll add a new social group called Mets fans at Basic Hotel. Here’s how:- On the organization’s Social Groups tab, click Add members.
- You’ll see every worker at the organization, listed under their department. Colored labels after a worker’s name show the groups they already belong to.
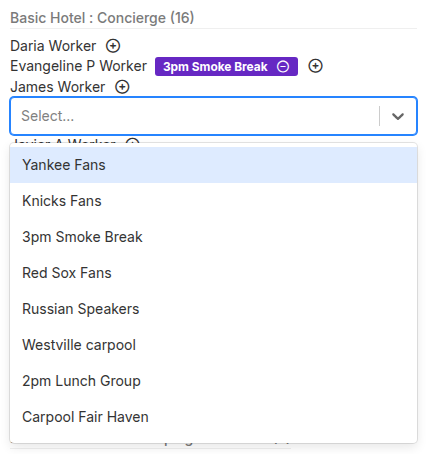
- Find a worker you want in the new group and click the plus icon () after their name. A drop-down list opens showing the groups the worker isn’t in yet.
- Type the name of the new group – here, “Mets fans” – and choose the Create “Mets fans” option that appears in the list.
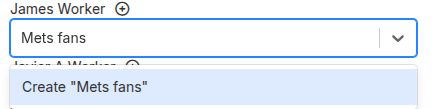
- Broadstripes creates the group and adds the worker to it. A message confirms the change, and the new group’s label appears after the worker’s name.
- To add more workers, click the plus icon after each name and pick the group from the list. Typing the first few letters of the group’s name narrows the list, so you don’t have to type the full name each time.
- To remove a worker from a group from this view, click the minus icon () on the group label after their name.
View your social groups
Click Show groups to see every group at the organization as a colored card, with the group’s members listed inside.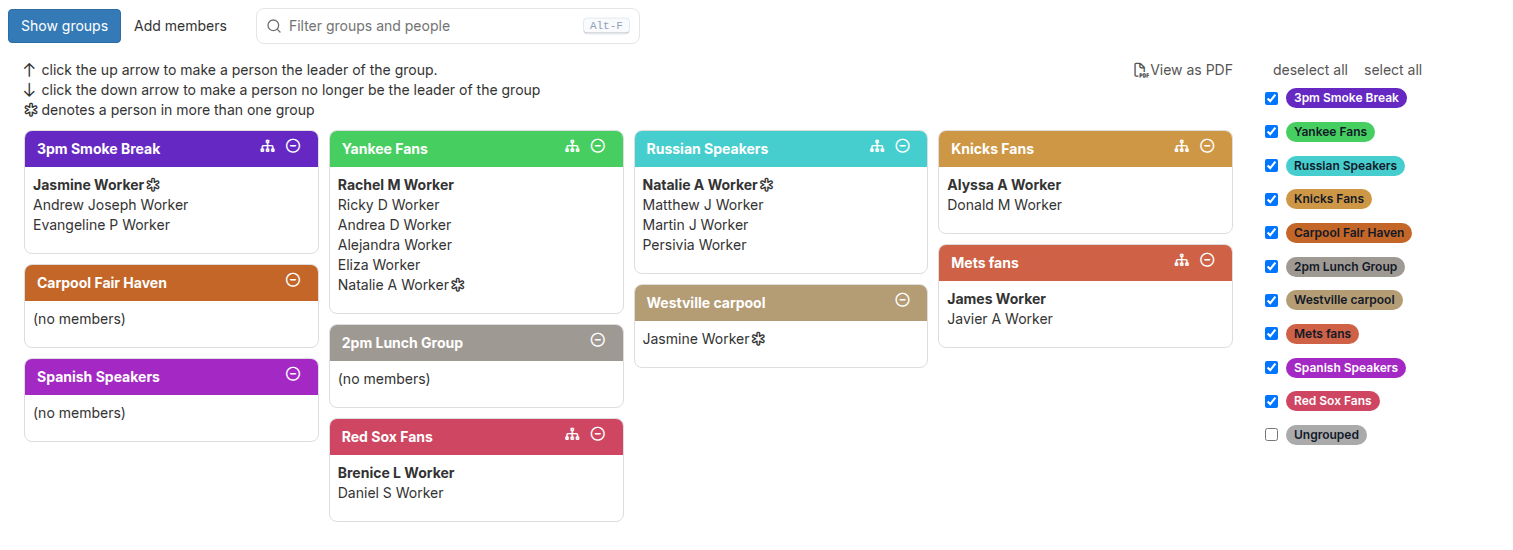
- The checklist on the right controls which groups are shown. Uncheck a group to hide its card, or use select all and deselect all to change them all at once.
- Ungrouped is a built-in card listing the workers who aren’t in any group yet. It’s unchecked by default; check it to see who still needs a group.
- A group’s leader (if it has one) is listed first, in bold. See below for how to pick a leader.
- A after a name means that person belongs to more than one group.
- Hover over a member’s name to reveal the actions for that person. To remove a member from the group, click the minus icon () that appears next to their name.
Filter groups and members
A filter box sits next to the Show groups and Add members buttons at the top of the page. Type any text to narrow what is displayed:- On the Show groups view, the filter hides group cards and the group checklist on the right to those whose name or member list matches your text. Matching member names appear highlighted inside the card. The select all and deselect all links act only on the groups currently visible.
- On the Add members view, the filter narrows the member list to people whose name or department name contains your text.

Select (or remove) the leader of a social group
In the last section, we created a new social group and added workers to it. Now we’ll give the social group a leader, and then turn that leader and their followers into Broadstripes organizing leadership:- The leader must already be a member of the group they’re going to lead (see above for how to add a member). On the Show groups view, hover over the member’s name and click the up arrow icon () that appears next to it.
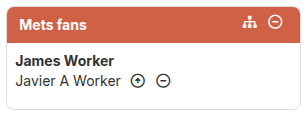
- The new leader moves to the top of the card in bold, and a Create structure icon () appears in the card’s header.
- To remove the leader, hover over their name and click the down arrow icon (). They stay in the group, but are no longer its leader.
Use social groups to create a leadership structure
Social groups can be a great shortcut for creating a lasting leadership structure in your project. Here’s how:- In any group that has a leader, click the Create structure icon () in the card’s header.
- The Create structure dialog lists the other members of the group. By default, Broadstripes checks the members who don’t already have a leader. Members who already have one are unchecked, with their current leader’s name in parentheses.
- Click all to check every member. This makes the social group leader their new leader, replacing any leader they had before.
- Click none to uncheck everyone, then check only the members the leader should lead.
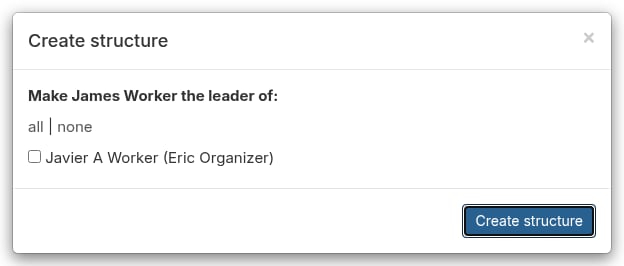
- Click Create structure. Broadstripes updates the leadership structure and confirms with a “Leadership structure created” message.
- To see the new structure, open the leader’s record page, click the Leadership tab, then click View Tree.

- The leader tree opens showing the structure you just created, with each person’s card in their position in the hierarchy. See View your organizing structure in the leader tree to learn how to navigate and use the tree.
Print or save your groups as a PDF
On the Show groups view, click View as PDF () above the group cards. Enter a name for the report, or keep the default “Social Groups”, and click OK. Broadstripes builds a PDF of every group that is checked in the checklist, one card per group with leaders in bold, and lets you know when it’s ready to download. You can also find it later under Reports in the sidebar.Delete or rename a social group
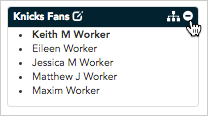
- To delete a social group, click the Remove group icon () in the upper right corner of its card and click OK to confirm. The members of the group stay in your project as contacts, but are no longer associated with the deleted group.
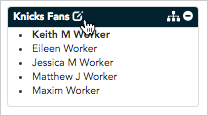
- To rename a social group, hover over the card’s header and click the Rename group icon () that appears next to its name. Type the new name in the dialog and click OK.
Where else social groups appear
- A worker’s record page and quick view list the social groups they belong to, so you can check a person’s groups without opening the organization.
- Add the Social Groups column to a layout to see each person’s groups in your search results. See Add a column to a layout.
- An organization’s Overview tab shows a Manage social groups link whenever social groups are allowed for it.